
Print design has one advantage over interactive designs – it can use other senses than sight to make design stand out. This is why I decided to make proper introduction into refining prints for those not that familiar with those techniques 🙂 Most of those are used on packaging and business cards and can really improve the experience of receiving prepared this way print.

This technique is simply embossing a foil (usually metallic but can be done with non metallic too) where it is pressed into paper by matrix transferring foil onto paper. It gives sense of sophistication and is often used on things like packaging (i.e. on alcohol or cosmetics labels). It is used many times for business cards too and often makes them simply look more expensive, which is desired in certain business branches. It can be mixed with blind stamping – not only stamping foil into paper but also giving it lowered the surface in comparison to the rest. As example I put leaflet that used gold foil on gold printed coated paper.

One of my favorite effects, that can be achieved by pressing matrix into paper without transferring a foil (like it is done in typical stamping). It looks beautiful when applied on not printed surface on thick printing paper, which would make design more prominent and standing out from the crowd. There are two types of those – embossing, which is pressing the positive of design into paper (paper is lowered in comparison to rest of paper surface – you can see the example above) and debossing – pressing negative of design into paper making its’ level above paper surface.

This is technique mostly used for things like brochures and packaging, and raises the price of print for sure, but definitely makes design more dynamic and interesting. Seems sometimes overdone but if handled properly can really raise the quality of the product and overall help it attract more attention. I love the way it is used on brochure above 🙂
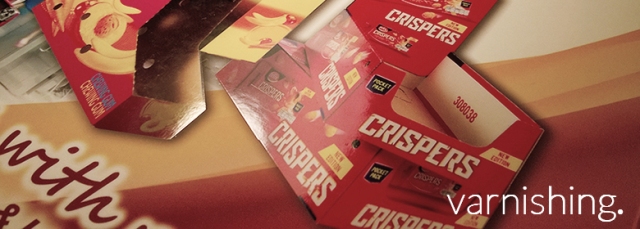
It is very popular technique and right now it’s rather a standard of refining. The result I like the most is matt foil with selective glossy varnish (as seen on example above and below). It looks best on surface with solid colors, since the print underneath and layer of selective varnish is often off set and not properly fitted, especially in printing houses concentrated more on quantity. Printing machines have certain tolerance when it comes to fitting of colors and varnish, which might not look as good in our eyes. I sometimes see properly fitted print and varnish, but that’s usually on exclusive products.

Great way of refining print if you wish to increase the durability of print as well as the look and smoothness of paper surface. You can use typical ones such as glossy or matt but there is also such types as iridescent or soft touch foils. Laminating print with foil just as varnishing is right now one of the basics and is very widely used. Using such technique depends on paper you chose though – thick printing paper looks best left untouched, laminating it removes its charm. Same goes for eco papers such as Kraft paper (yes, I met a client once who desperately wanted to make calendar with laminated eco paper cover).

This isn’t the most common technique but it looks amazing when used properly. Most usually used for books and more exclusive editions of those, such as limited or collector’s edition or simply more exclusive publications. In my opinion it looks best with clean simple design on white paper (and in this case the more white space the better). Printing houses often offer such refining, but if used on small amount of prints it can be achieved at home – just take stack of paper with a weight on top and use spray paint on edges 🙂 Most often seen in silver and gold variation but I love the look of matt color on edge as well. It looks the best when used on thicker paper, usually from 200 gsm up.

source: http://www.letterpresser.co.uk/
That technique involves sprinkling metallic powder onto fresh, not dried yet paint. Effect is really beautiful and unusual. It’s not very often used method but does give nice finish. In the beginning it was usually used with bronze powder (hence the name) but right now it can be used with gold, silver, or even holographic powder. Not many printing houses carry that service and it is considered rather exclusive finish.

This technique allows to use screen printing on paper with clear medium that gives your print very unusual surface.. It is mostly widely used on fabrics or packaging, but can be also used for covers. Thick clear medium is printed onto surface creating 3D effect that we decide on. I met many different textures like ones imitating fruit skin, animal skin or knit. Usually provided by printing houses that specialise in such techniques (such as screen printing houses or centers that provide solely refining surface services). Additional example:

Thank you very much for reading! All examples (except bronzing) are from my personal collection and photos were made by me 🙂 Unfortunately the quality isn’t amazing since day time is so short right now *sigh*. I hope you enjoyed this post, I will definitely continue this series in the future!


